
Introduction:
Hello, calisthenics enthusiasts! Welcome to my blog, where we dive deep into the art of bodyweight training. I’m Andry Strong, and today I’ll guide you through learning one of the most challenging and rewarding calisthenics skills: the handstand push-up. With my personal best of 40 reps and 17 reps with an additional 20 kilos, I can confidently help you achieve your first handstand push-up. By the end of this guide, you’ll know exactly where to start and how to progress.
Requirements:
Before starting to learn the handstand push-up, you should be able to hold a handstand for at least 15-20 seconds. If you can’t hold it for this duration, it will be difficult to control your balance while pushing up.
Step-by-Step Guide:
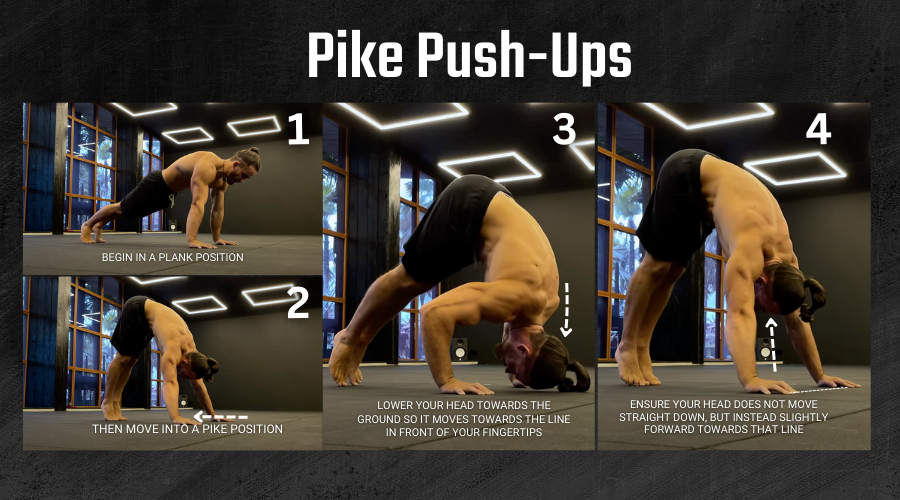
Step 1: Pike Push-Ups
- Starting Position: Begin in a plank position, then move into a pike position by lifting your hips up towards the ceiling, forming an inverted V-shape with your body.
- Execution: Lower your head towards the ground so it moves towards the line in front of your fingertips, then push back up. Ensure your head does not move straight down, but instead slightly forward towards that line.
- Repetitions: Perform this movement in sets until you feel comfortable and strong.
Step 2: Elevated Pike Push-Ups
- Equipment Needed: Use a box, a P-bar, or a bed to elevate your feet.
- Starting Position: Place your toes on the elevated surface and move into a pike position.
- Execution: Lower your head towards the ground in front of your hands, then push back up. Maintain a straight body line throughout the movement.
- Repetitions: Continue practicing until this variation feels manageable.

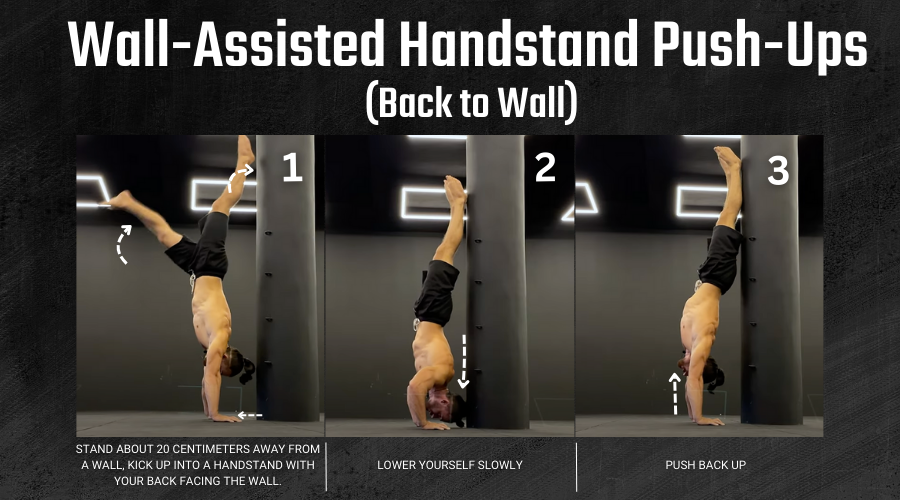
Step 3: Wall-Assisted Handstand Push-Ups (Back to Wall)
- Starting Position: Stand about 20 centimeters away from a wall, kick up into a handstand with your back facing the wall.
- Execution: Lower yourself slowly, then push back up. Move slightly forward as you descend and return to a straight line as you push up.
- Repetitions: Practice this until you can maintain control throughout the movement.
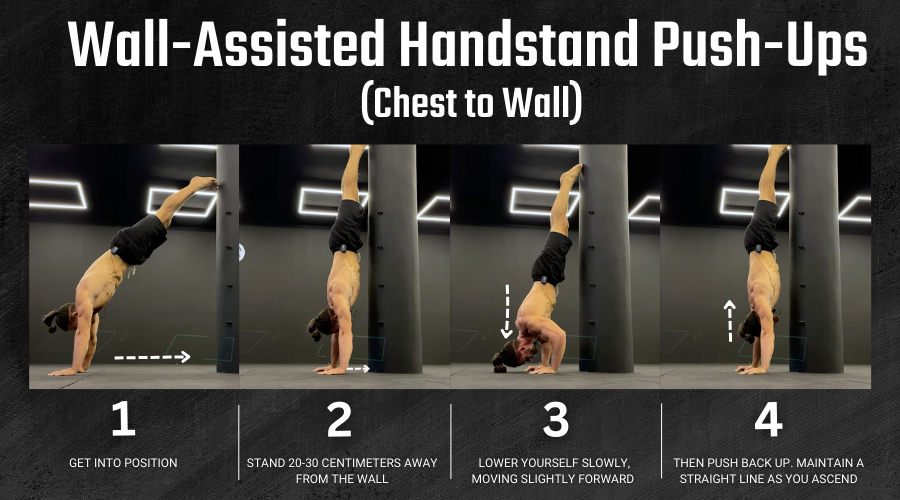
Step 4: Wall-Assisted Handstand Push-Ups (Chest to Wall)
- Starting Position: Stand 20-30 centimeters away from the wall, kick up into a handstand with your chest facing the wall.
- Execution: Lower yourself slowly, moving slightly forward, then push back up. Maintain a straight line as you ascend.
- Repetitions: Keep practicing until this becomes comfortable.
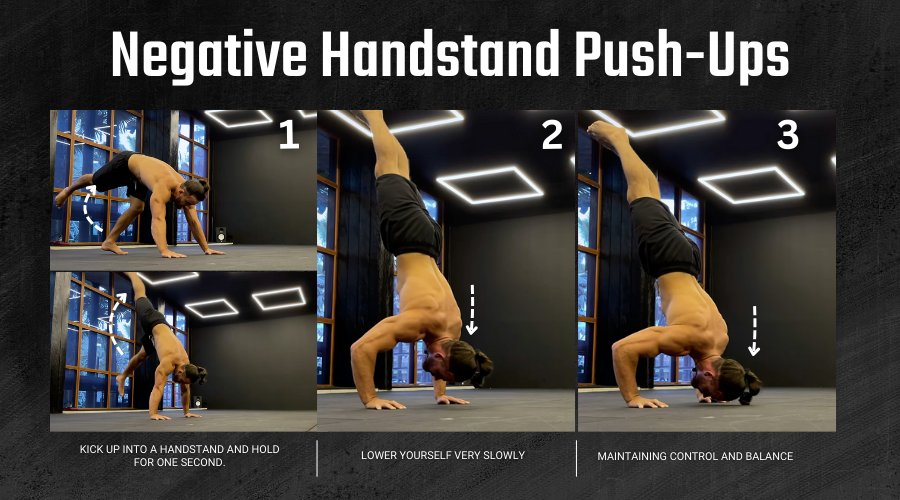
Step 5: Negative Handstand Push-Ups
- Starting Position: Kick up into a handstand and hold for one second.
- Execution: Lower yourself very slowly, maintaining control and balance. Focus on a straight body line.
- Repetitions: Perform multiple slow descents to build strength and balance.
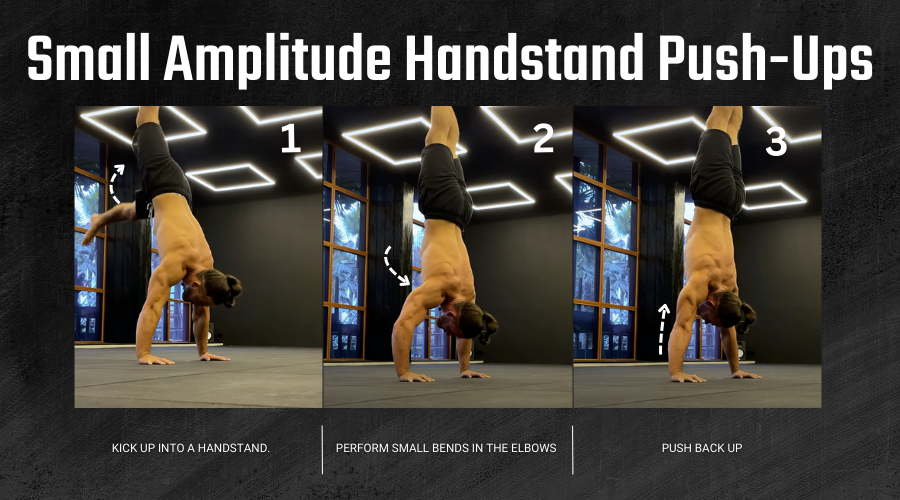
Step 6: Small Amplitude Handstand Push-Ups
- Starting Position: Kick up into a handstand.
- Execution: Perform small bends in the elbows and push back up. This step is crucial for developing balance and control.
- Repetitions: Practice until you can maintain balance and control.
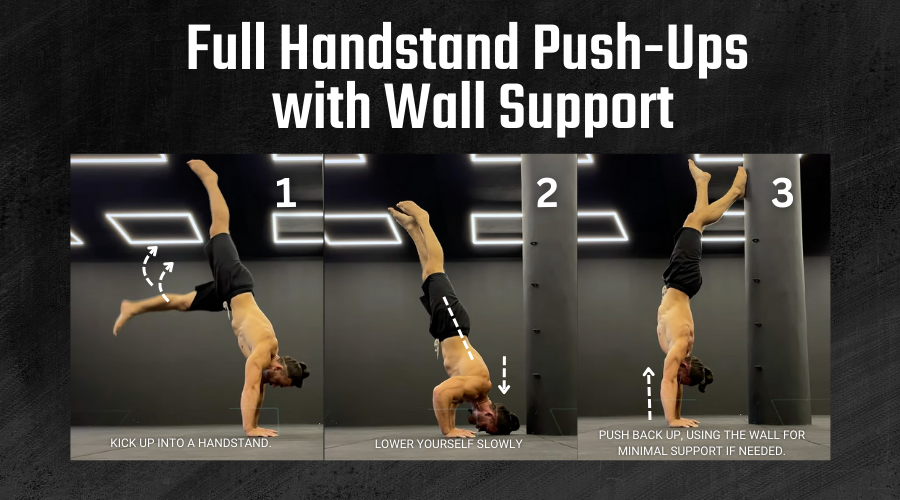
Step 7: Full Handstand Push-Ups with Wall Support
- Starting Position: Kick up into a handstand with your back facing the wall.
- Execution: Lower yourself slowly and push back up, using the wall for minimal support if needed.
- Repetitions: Continue until you can perform the push-up without touching the wall.
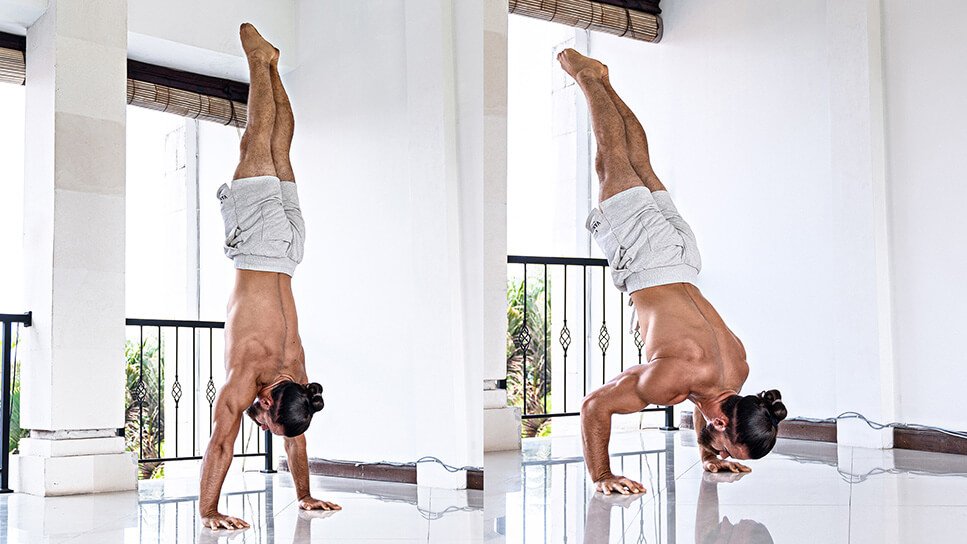
Final Step: Perfect Handstand Push-Up
- Starting Position: Kick up into a handstand.
- Execution: Lower yourself while keeping a straight back and push back up. Maintain perfect form throughout the movement.
- Repetitions: Practice until you can perform a perfect handstand push-up with ease.
Final Thoughts:
Consistent practice is key to mastering the handstand push-up. Train twice a week, following the step-by-step progression, and focus on improving your balance and strength. If you want a full handstand push-up routine, including rest periods, reps, and sets, leave a comment, and I’ll create one for you.
Thank you for watching and reading. Keep pushing your limits and good luck on your handstand push-up journey!
Ready to elevate your calisthenics skills? Watch the full tutorial video
If you read through all of this and found it helpful, but still would like that extra help – an exact path to follow – then for sure my Andry Strong Academy app will be of invaluable use to you. In it, there are 5 full calisthenics programs, of increasing difficulty, with entire workout sessions in each. The programs are designed to last 12 weeks and each day is planned for you. Specific exercises, sets, and reps are already laid out for you. Each exercise within a session has video description as well as form cues, leaving no guesswork. If you are truly committed to learning calisthenics, then getting started on one of these programs is for you.