 Skip to content
Introduction:
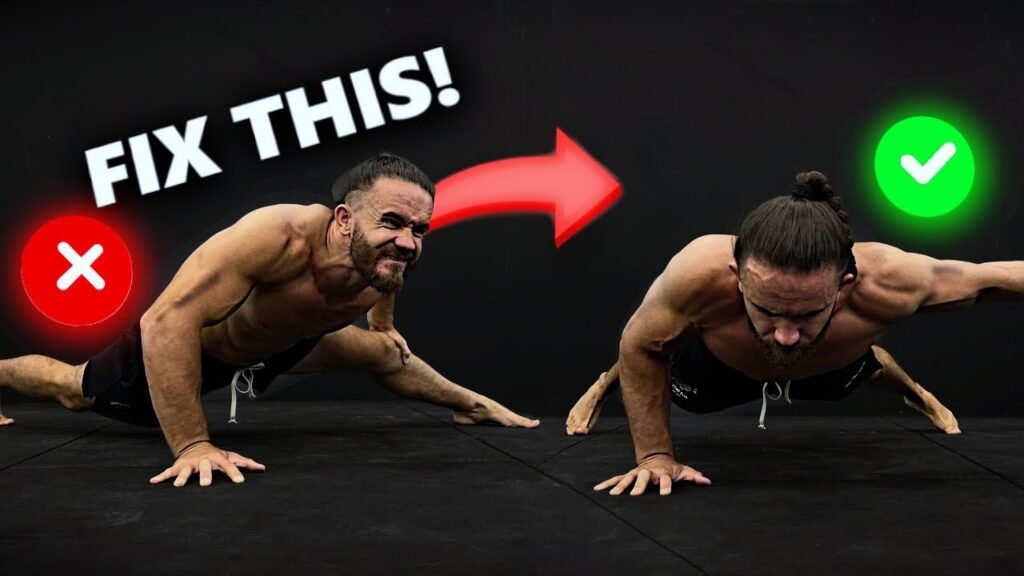
Hello, calisthenics enthusiasts! Welcome to my blog, where we explore the world of bodyweight training. I’m Andry Strong, and today I will guide you through learning one of the most impressive calisthenics skills: the one-arm push-up. By the end of this post, you’ll have all the knowledge you need to perform a perfect one-arm push-up.
Requirements:
Before starting to learn the one-arm push-up, you should be able to perform at least 30 regular push-ups with good form. This foundation is crucial for progressing to the more advanced variations.
Muscles Worked:
- Primary: Pectoralis major (chest), triceps brachii (back of the arm), deltoids (shoulders).
- Secondary: Rectus abdominis (abs), obliques, lower back, glutes, and stabilizing muscles in the shoulder girdle.
Benefits:
- Strength Development: Builds significant strength in the chest, triceps, and shoulders.
- Core Stability: Engages the core muscles to a high degree to maintain balance and proper form.
- Improved Balance: Enhances balance and coordination due to the unilateral nature of the exercise.
- Functional Fitness: Improves overall functional strength, useful for various physical activities and sports.
Step-by-Step Guide:
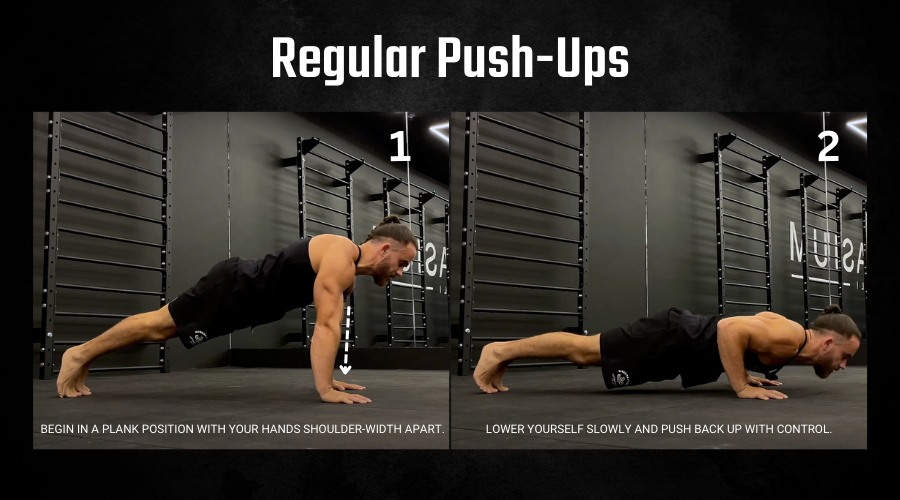
Step 1: Regular Push-Ups
- Starting Position: Begin in a plank position with your hands shoulder-width apart.
- Execution: Lower yourself slowly and push back up with control. Focus on maintaining good form throughout the movement.
- Repetitions: Perform at least 30 reps with good quality to build the necessary strength.
- Common Mistakes to Avoid:
- Hip Rotation: Ensure your hips remain level and do not twist during the movement.
- Elbow Flare: Keep your working elbow close to your body to prevent excessive strain on the shoulder.
- Sagging Core: Engage your core throughout the exercise to maintain proper form and stability.
- Rushed Reps: Avoid performing reps too quickly; focus on controlled and deliberate movements.
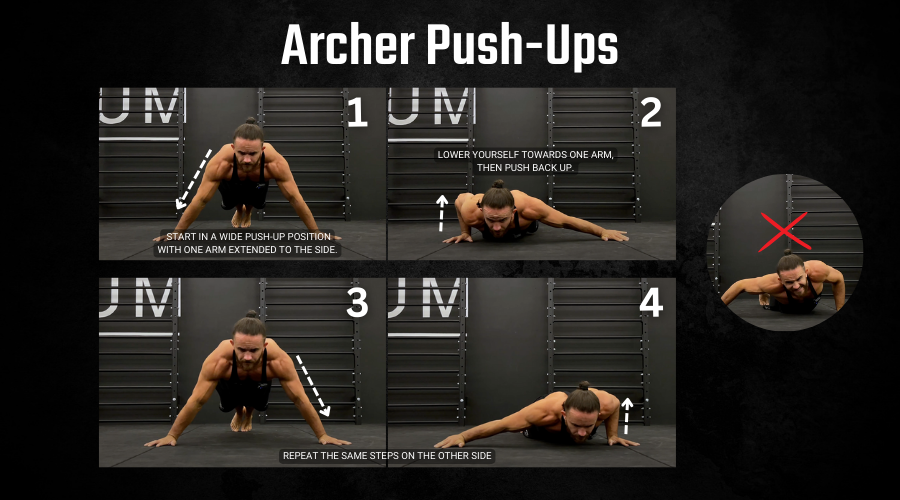
Step 2: Archer Push-Ups
- Starting Position: Start in a wide push-up position with one arm extended to the side.
- Execution: Lower yourself towards one arm, then push back up. Move slowly and maintain good form.
- Repetitions: Perform this exercise in sets, focusing on quality and control.
- Common Mistakes to Avoid:
- Uneven Weight Distribution: Ensure the weight is evenly distributed to the working arm.
- Improper Form: Maintain a straight body line and avoid twisting your torso.
Step 3: Elevated One-Arm Push-Ups
- Equipment Needed: Use blocks, books, or any stable elevated surface.
- Starting Position: Place one hand on the elevated surface and the other hand on the ground.
- Execution: Lower yourself slowly towards the ground, focusing on the arm on the ground, then push back up. Keep the elevated arm straight.
- Repetitions: Practice until you can maintain control and balance throughout the movement.
- Common Mistakes to Avoid:
- Inadequate Support: Ensure the elevated surface is stable to prevent injuries.
- Rushed Movements: Focus on slow, controlled movements to build strength effectively.

Step 4: One-Arm Push-Ups with Finger Support
- Starting Position: Begin in a one-arm push-up position with your supporting hand on your fingers.
- Execution: Start with five fingers, then gradually reduce to four, three, two, and one finger as you lower and push back up. Focus on keeping the weight on the working arm.
- Repetitions: Adjust the number of fingers for support based on your strength and control. Do not rush this step.
- Common Mistakes to Avoid:
- Over-Reliance on Fingers: Gradually reduce finger support to ensure the working arm bears most of the weight.
- Poor Form: Maintain a straight body line and avoid twisting your torso.

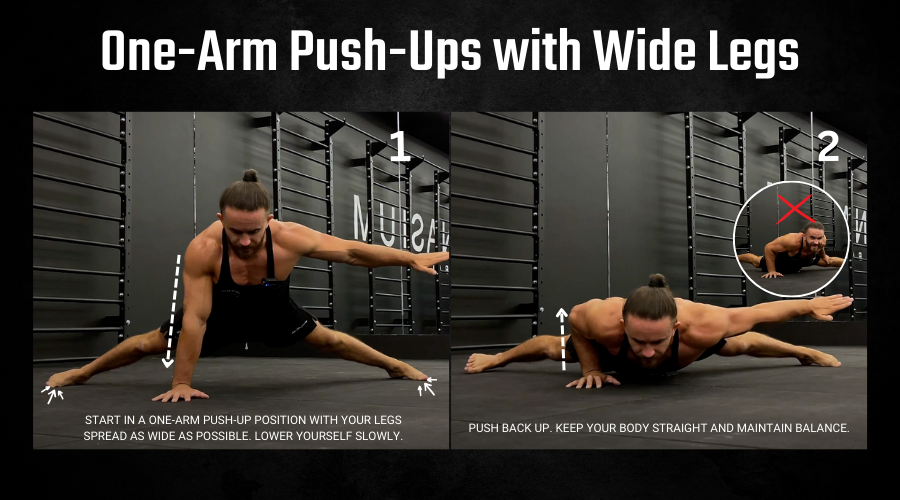
Step 5: One-Arm Push-Ups with Wide Legs
- Starting Position: Start in a one-arm push-up position with your legs spread as wide as possible.
- Execution: Lower yourself slowly and push back up. Keep your body straight and maintain balance.
- Repetitions: Practice until you can perform this variation with control and stability.
- Common Mistakes to Avoid:
- Inconsistent Leg Width: Ensure your legs are spread evenly to maintain balance.
- Twisting Torso: Keep your torso straight and avoid twisting during the movement.
Final Step: Perfect One-Arm Push-Up
- Starting Position: Begin in a one-arm push-up position with your legs at a comfortable width.
- Execution: Lower yourself slowly with good form, keeping your body straight, then push back up.
- Repetitions: Perform the exercise until you can achieve a perfect one-arm push-up with ease.
- Common Mistakes to Avoid:
- Improper Form: Maintain a straight body line and avoid twisting your torso.
- Rushed Reps: Focus on slow, controlled movements to build strength effectively.

Ready to elevate your calisthenics skills? Watch the full tutorial video:
If you read through all of this and found it helpful, but still would like that extra help – an exact path to follow – then for sure my Andry Strong Academy app will be of invaluable use to you. In it, there are 5 full calisthenics programs, of increasing difficulty, with entire workout sessions in each. The programs are designed to last 12 weeks and each day is planned for you. Specific exercises, sets, and reps are already laid out for you. Each exercise within a session has video description as well as form cues, leaving no guesswork. If you are truly committed to learning calisthenics, then getting started on one of these programs is for you.
