Introduction:
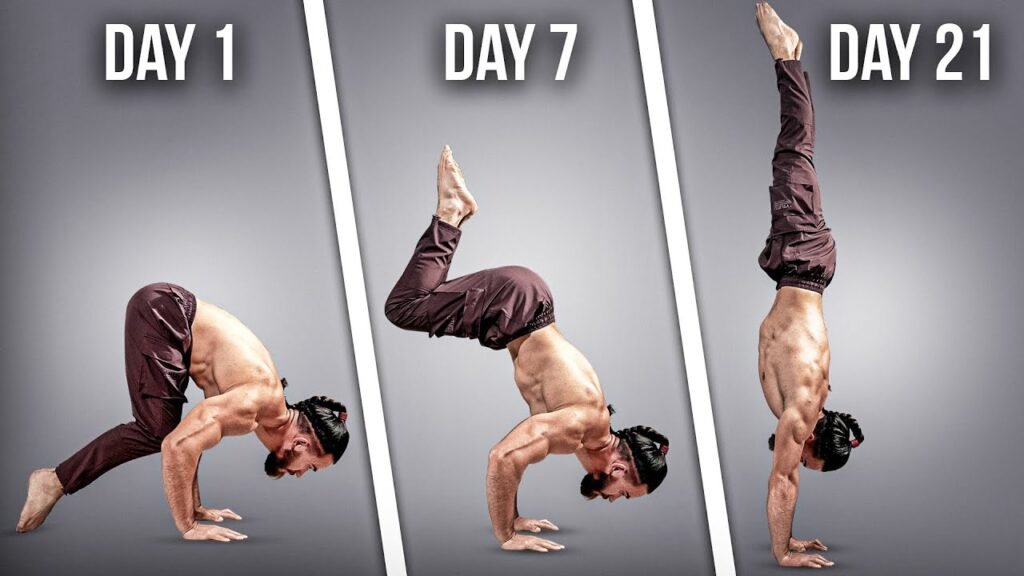
Hello, calisthenics enthusiasts! Welcome to my blog, where we delve into the world of bodyweight training. I’m Andry Strong, and today I’ll guide you through learning the bend arm press to handstand. By the end of this post, you’ll know exactly how to start and progress.
Requirements:
Before starting to learn the bend arm press to handstand, you should be able to do at least five elevated pike push-ups and hold a handstand for five seconds. This ensures your muscles are ready for the advanced movement.
Muscles Worked:
- Primary: Shoulders, triceps, core.
- Secondary: Chest, lower back, glutes, stabilizing muscles.
Benefits:
- Strength Development: Builds significant strength in the shoulders, triceps, and core.
- Balance Improvement: Enhances balance and coordination due to the need for precise control.
- Core Stability: Engages and strengthens the core muscles to maintain proper form.
- Functional Fitness: Improves overall functional strength, useful for various physical activities and sports.
Step-by-Step Guide
Technique
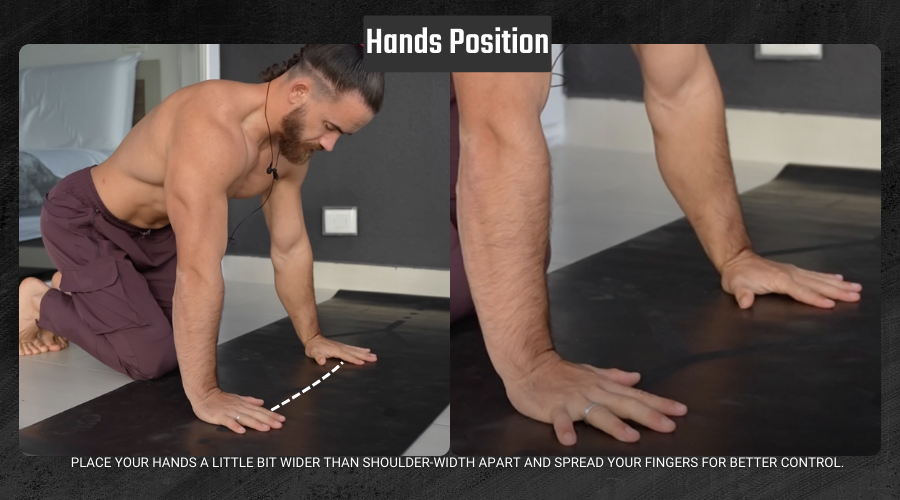
Hands Position: Place your hands a little bit wider than shoulder-width apart and spread your fingers for better control. This is the starting position. Keep your legs bent a little bit.
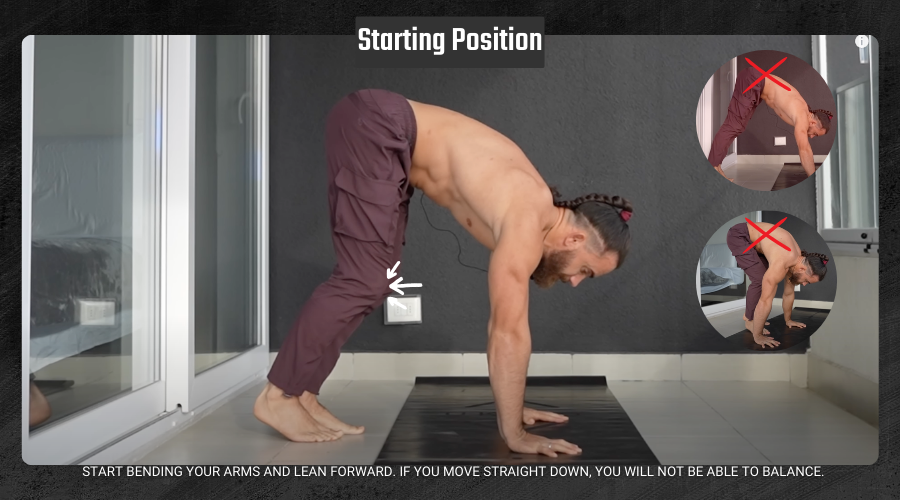
- Starting Position: Start bending your arms and lean forward. If you move straight down, you will not be able to balance. From here, move forward, bend your arms, and keep your elbows close to your body. Do not bend your arms too much because the more you bend, the harder it will be to push.
Steps:
- Lean Forward: Shift your weight onto your hands.
- Press Hips Up: Start pressing your hips up and bring your knees to your chest.
- Lift Off: Lift your feet off the ground for a second to get the feel of the movement.
- Full Press: Slowly press your hips up and extend your legs to a vertical position.
- Balance: Engage your core and lock your elbows to maintain balance.
Common Mistakes to Avoid:
- Moving straight down instead of leaning forward.
- Bending the arms too much.
- Not engaging the core and glutes.
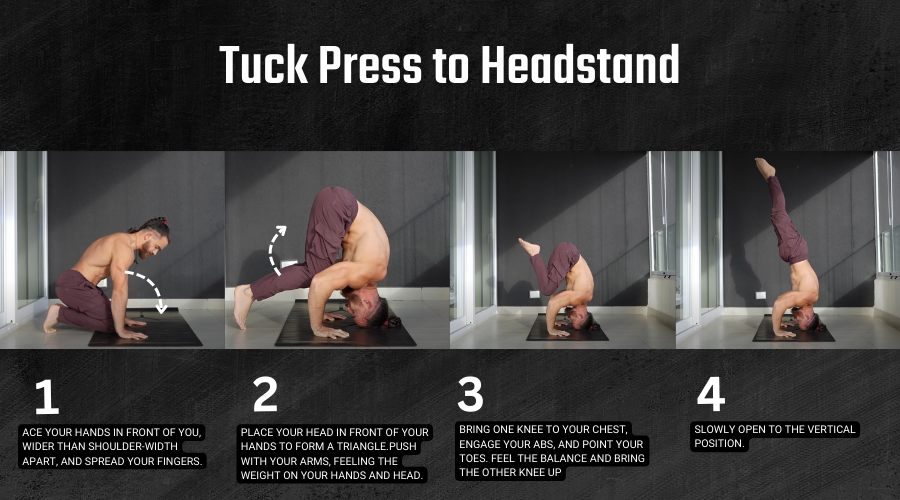
Step 1: Tuck Press to Headstand
Starting Position: Place your hands in front of you, wider than shoulder-width apart, and spread your fingers.
- Head Placement: Place your head in front of your hands to form a triangle.
- Push Up: Push with your arms, feeling the weight on your hands and head.
- Hip Lift: Start pressing your hips upward.
- Knee to Chest: Bring one knee to your chest, engage your abs, and point your toes.
- Balance: Feel the balance and bring the other knee up.
- Vertical Position: Slowly open to the vertical position.
Practice Tip: If you are afraid of falling forward, practice close to a wall for support.
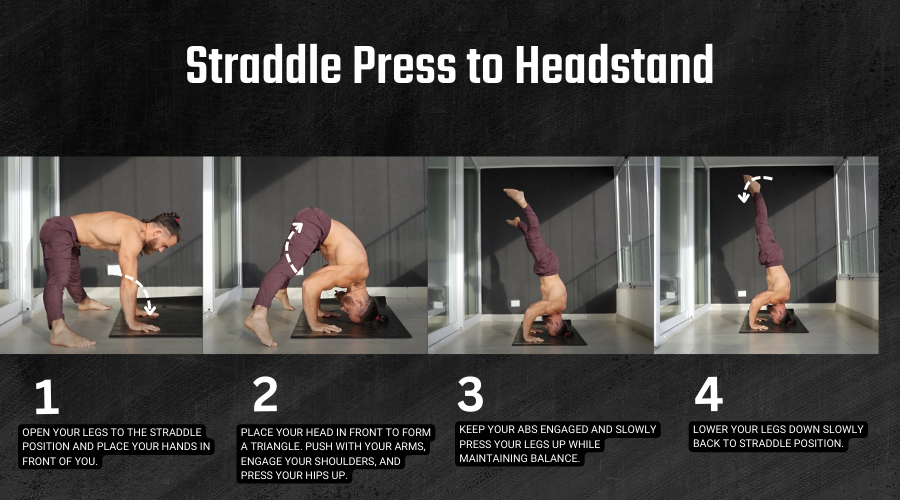
Step 2: Straddle Press to Headstand
Starting Position: Open your legs to the straddle position and place your hands in front of you.
- Lean Forward: Place your head in front to form a triangle.
- Push Up: Push with your arms, engage your shoulders, and press your hips up.
- Balance: Keep your abs engaged and slowly press your legs up while maintaining balance.
- Hold Position: Hold the position for a few seconds before lowering your legs back down.
Practice Tip: Pay attention to keeping the weight on your hands, not just your head.
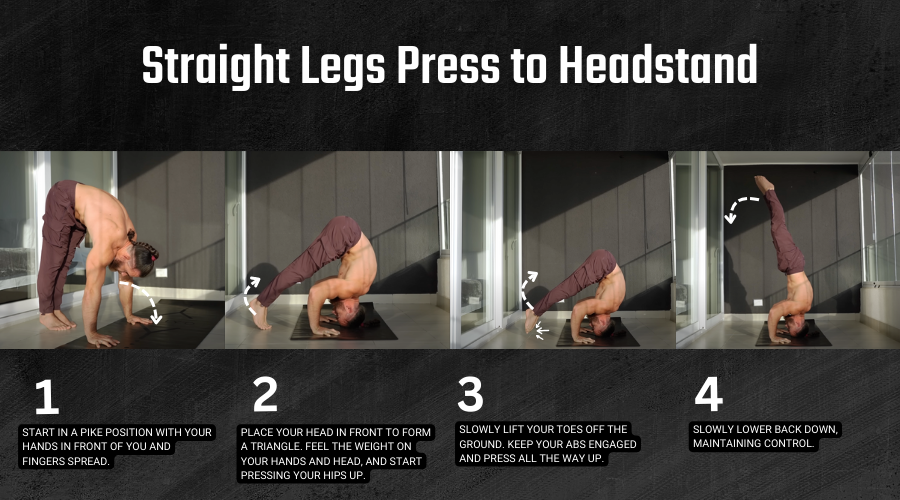
Step 3: Straight Legs Press to Headstand
Starting Position: Start in a pike position with your hands in front of you and fingers spread.
- Head Placement: Place your head in front to form a triangle.
- Push Up: Feel the weight on your hands and head, and start pressing your hips up.
- Lift Off: Slowly lift your toes off the ground.
- Vertical Position: Keep your abs engaged and press all the way up.
- Control Descent: Slowly lower back down, maintaining control.
Practice Tip: If you feel the weight shifting to your head, practice near a wall for safety.
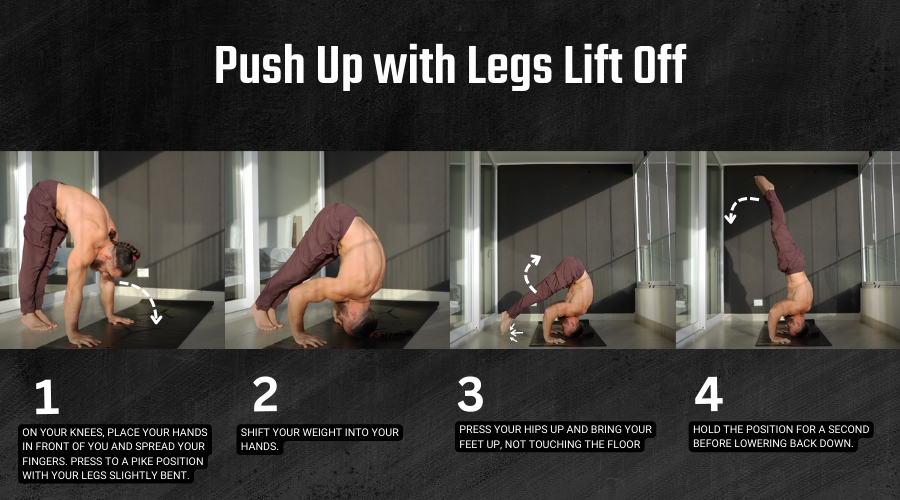
Step 4: Push Up with Legs Lift Off
Starting Position: On your knees, place your hands in front of you and spread your fingers.
- Pike Position: Press to a pike position with your legs slightly bent.
- Lean Forward: Shift your weight into your hands.
- Hip Lift: Press your hips up and bring your knees to your chest.
- Hold: Hold the position for a second before lowering back down.
Practice Tip: Feel the weight always on your hands, not on your toes.
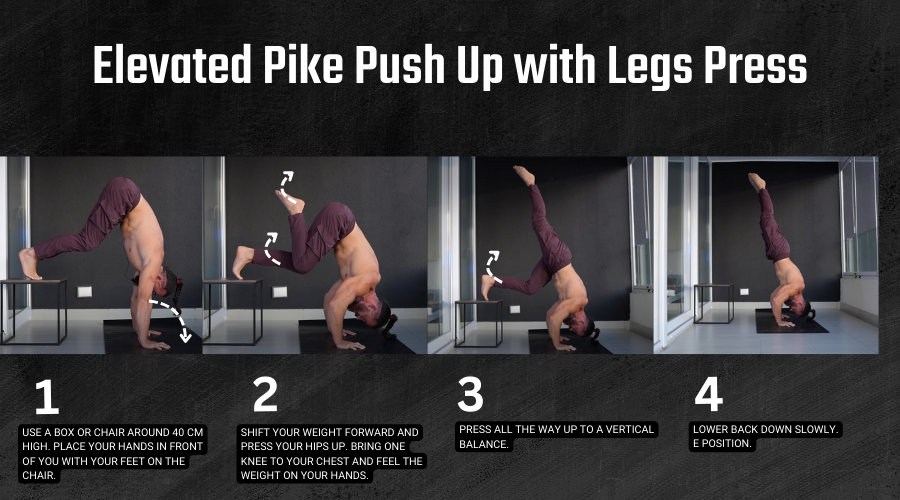
Step 5: Elevated Pike Push Up with Legs Press
Starting Position: Use a box or chair around 40 cm high.
- Hand Placement: Place your hands in front of you with your feet on the chair.
- Lean Forward: Shift your weight forward and press your hips up.
- Knee to Chest: Bring one knee to your chest and feel the weight on your hands.
- Press Up: Press all the way up to a vertical balance.
- Control Descent: Lower back down slowly.
Practice Tip: Perform each movement slowly with control, holding each position for at least a second.
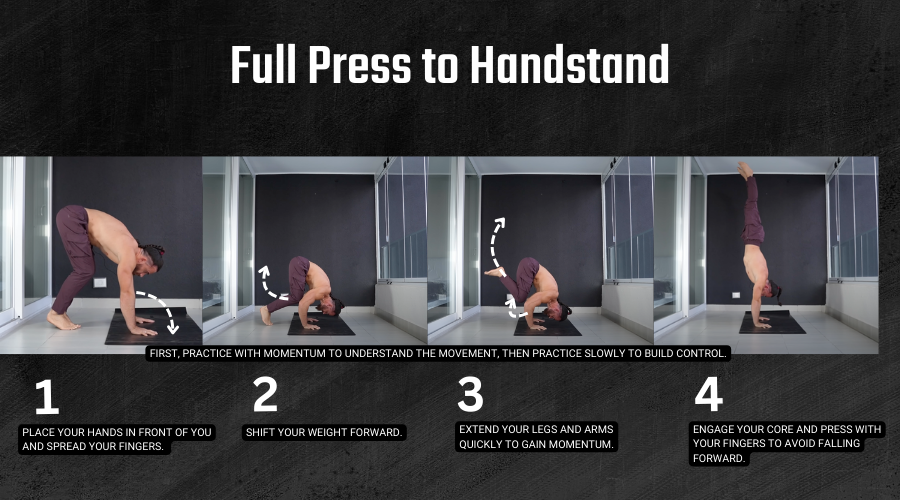
Step 6: Full Press to Handstand
Starting Position: Place your hands in front of you and spread your fingers.
- Lean Forward: Shift your weight forward.
- Press Up: Extend your legs and arms quickly to gain momentum.
- Balance: Engage your core and press with your fingers to avoid falling forward.
- Control: Practice near a wall if needed for balance.
Practice Tip: First, practice with momentum to understand the movement, then practice slowly to build control.
Conclusion:
Consistent practice is key to mastering the bend arm press to handstand. Train regularly, follow these steps, and focus on improving your strength and technique. If you enjoyed this post and found it helpful, give it a thumbs up, leave a comment, and stay tuned for more content. Don’t forget to follow me on Instagram for updates on my app and more calisthenics tips.
Ready to elevate your calisthenics skills? Watch the full tutorial video: Bend Arm Press to Handstand Tutorial
If you read through all of this and found it helpful, but still would like that extra help – an exact path to follow – then for sure my Andry Strong Academy app will be of invaluable use to you. In it, there are 5 full calisthenics programs, of increasing difficulty, with entire workout sessions in each. The programs are designed to last 12 weeks and each day is planned for you. Specific exercises, sets, and reps are already laid out for you. Each exercise within a session has video description as well as form cues, leaving no guesswork. If you are truly committed to learning calisthenics, then getting started on one of these programs is for you.

